
Many instructors create their syllabi as a document and provide that to their students via a link or in the files section of Canvas. There are benefits to including the content of your syllabus in the syllabus page. This “how to” provides information on how to bring your document content into the Canvas syllabus page and then how to add some style to the page.
For best results, it would be worth the effort to import your content block by block. If you have set up your heading structure correctly in your document, then the theme you choose will apply to the entire syllabus page in Canvas rather than just the top of the page. This approach is not covered in its entirety in this guide. To get help on the block-by-block import, please contact eLearning or check out the Cidi Labs user guides.
Important Tip: Remember that the content in any two or more versions of your syllabus should match.
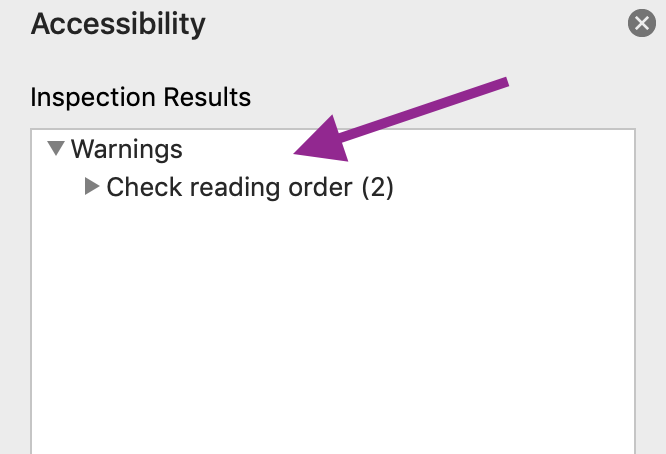
- Open your current syllabus document and run the accessibility checker.

2. Fix any accessibility issues that come up in the report.
3. Save your syllabus and copy the entire content of the document.
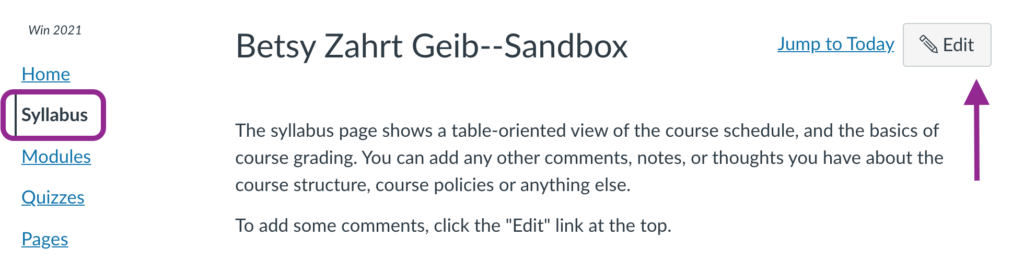
4. Open the syllabus page in Canvas by clicking on edit from the syllabus screen.
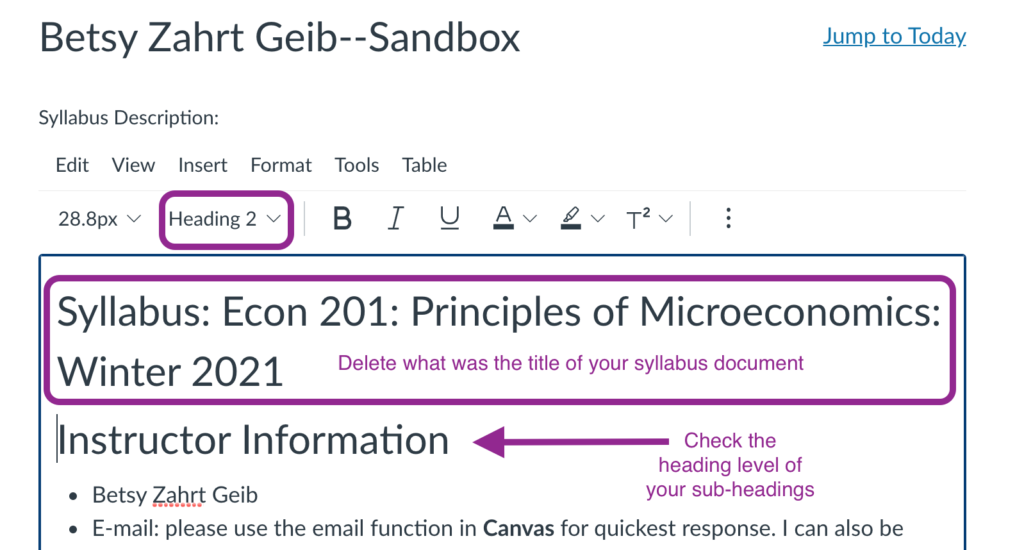
5. Paste your syllabus content into the Canvas syllabus page. Delete what used to the be the title of the syllabus from the syllabus page, then double check that your sub-headings are set to H2.
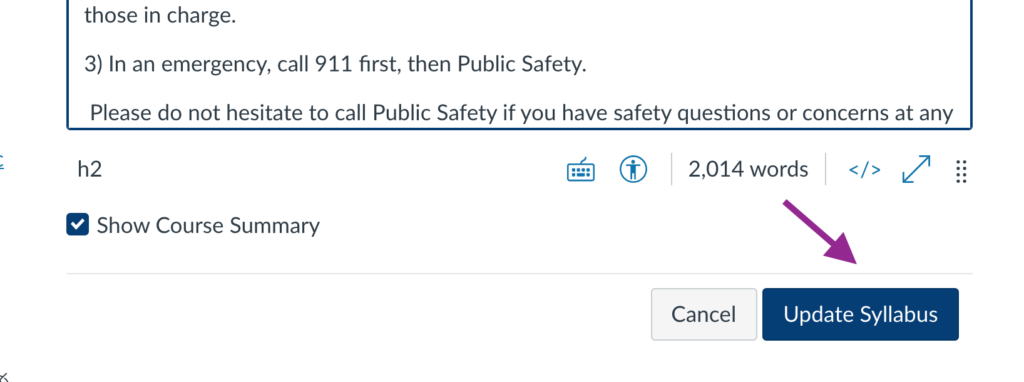
5. Save your changes by clicking “update syllabus.”
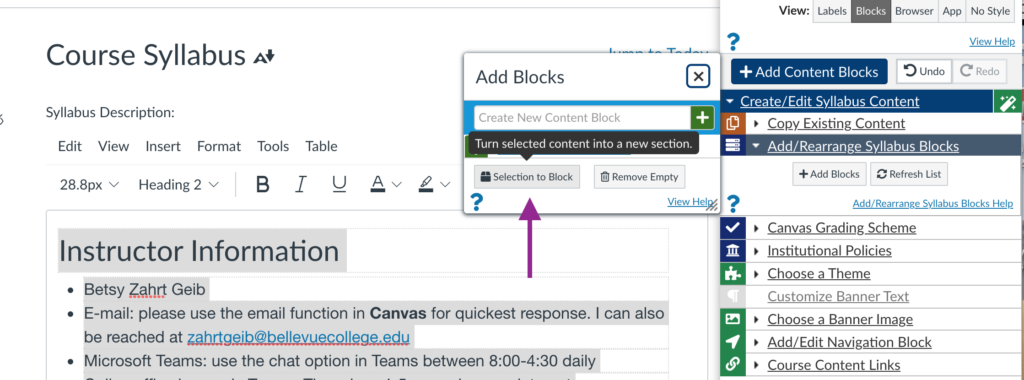
- Click on edit from the syllabus page in Canvas.
2. Launch the Design Tools interface by clicking on the rocket icon in the upper right-hand corner of the screen, or by using the short-cut keys Option-Shif-D on a Mac or Alt-Shift-D on a PC.

3. Select your entire syllabus, then choose “add content blocks” and select “add selection to block.” Alternatively, you can select only a block of your syllabus at a time and add each section one by one.
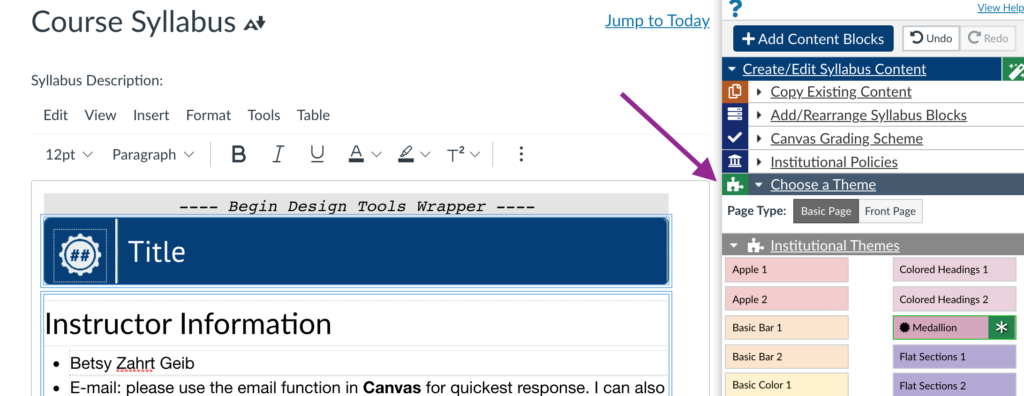
4. Open the “choose a theme” option in the Design Tools and choose a theme. You can scroll over the different options to see a pop-up representation of the theme. Note, if you selected the entire syllabus as a block, the theme will apply only to the top of the syllabus. If you brought the syllabus in block by block, the theme will apply to each block.
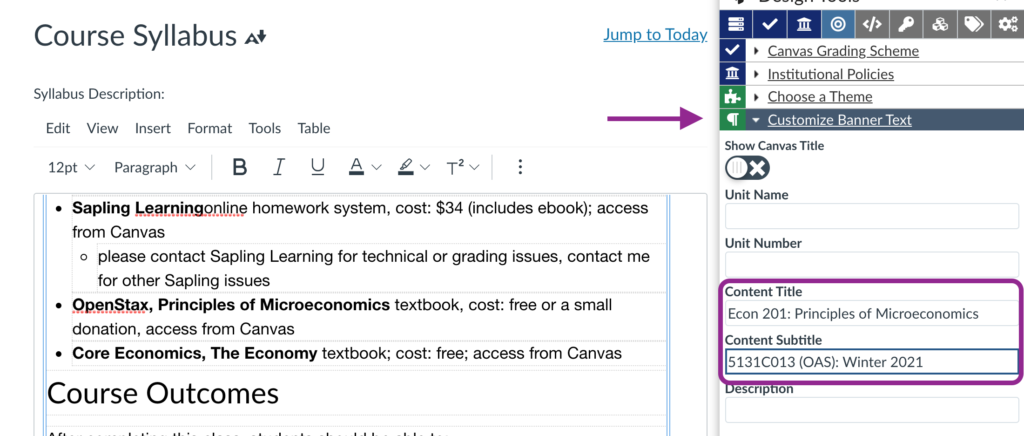
5. Add a customized title and subtitle by clicking on the “customize banner text” option in the Design Tools editor.
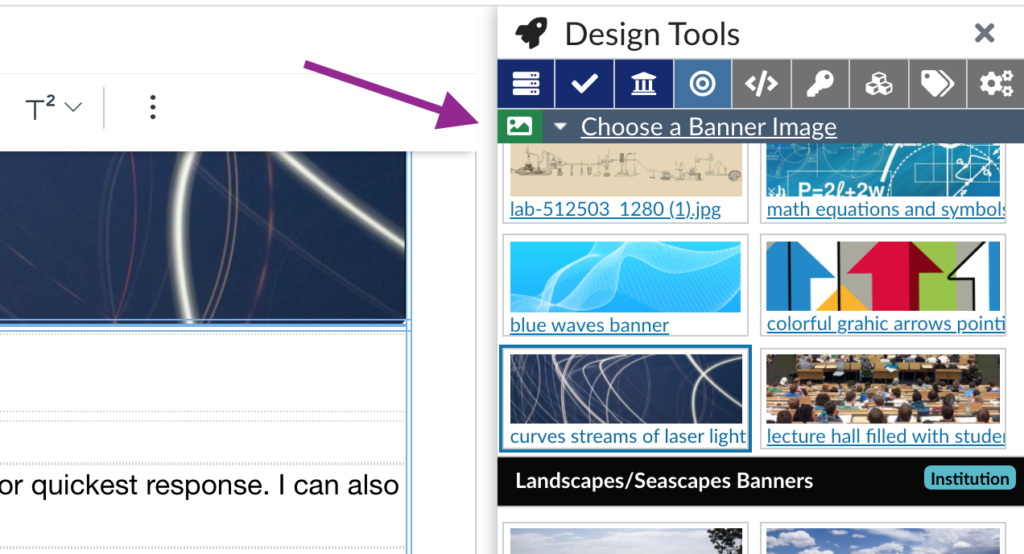
6. Choose a banner image from those available in the “choose a banner image” option in the Design Tools editor. You can choose from institutional banners or from your own files.
7. Save your changes.
Last Updated October 4, 2021