


ChatGPT is an AI tool that can chat with you like a human. It’s trained on massive amounts of internet text and can help with everything from answering questions to translating languages. You can also create the same interactions with your own content. This process is called fine-tuning, and can help you create chat bots, analyze sentences according to parameters you define or summarize content, among others. Here are some steps that will guide you through the fine-tuning process:
- Choose a pre-built AI platform
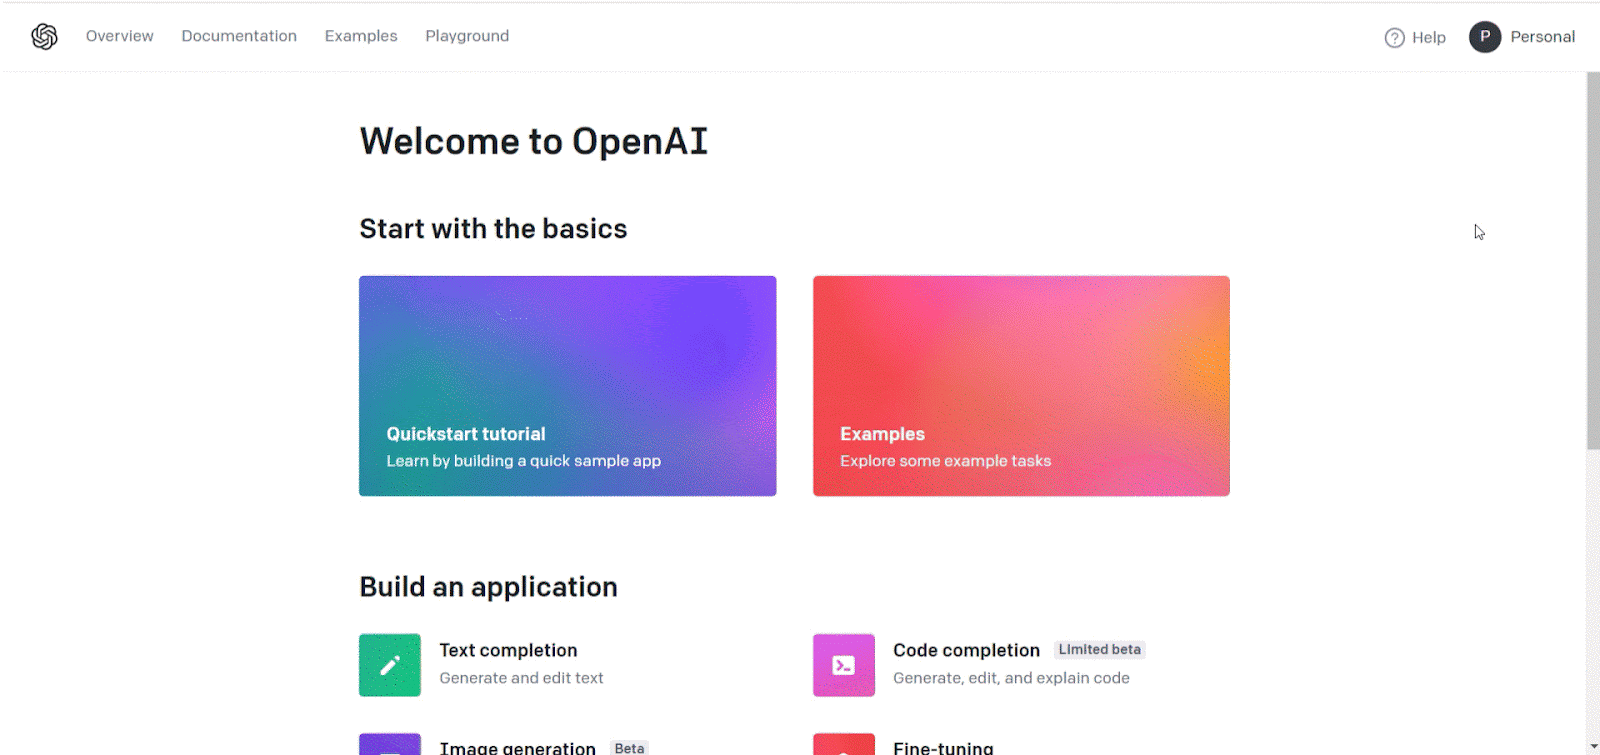
There are many pre-built AI platforms that allow you to create your own AI models. Some of these platforms are run by big companies like Google, IBM and Microsoft. However for this example we are going to focus on OpenAI, which is the company that owns ChatGPT.
- Create an account on OpenAI
In order to train your own model you need to create an account on the OpenAI (API) website and you have to add your credit card. This is because everytime that you fine-tune a model, you are billed for the tokens you use to process information. You can think of tokens as pieces of words, where 1,000 tokens are about 750 words.
- Get an API key
The next step is to get an API key. Think of an API like a set of puzzle pieces that fit together to make a complete picture. Each puzzle piece represents a different function or set of data, and the API defines the rules for how those pieces can be connected and used.
Once you’re logged into OpenAI, click on your profile on the top right and then navigate to the “View API keys” tab. After, click on the “Create API key” button. Click on the “Create” button, and your API key will be generated and displayed on the screen. Make sure to copy it and keep it in a safe place.
- Define your problem and gather data
Before you can train an AI model, you need to define your problem and gather data relevant to that problem. For example, if you want to build a model to predict customer churn, you’ll need data on customer behavior, such as past purchases and customer feedback.
For this example we will use data from the XR Lab of Bellevue College since we want to build our own conversation agent, a type of AI software that is designed to simulate human conversation. It uses natural language processing and other technologies to handle simple inquiries and respond to user inputs in the form of text.
- Prepare your data
For the data we need to create a spreadsheet with two columns, one with the prompt (questions) and other one with the completion (answers). Depending on the depth of the content you will need to create at least 20 rows of prompts but the more the better.
Phrasing the questions in different ways will help you to have better results. Try to find how people will formulate questions, and train the model on those variations too. Once you have your information ready, you can export it as a CSV file.

If you want you can download and practice with this data:
https://docs.google.com/spreadsheets/d/12HZ6qTno2Vp_hBn4cLaSCmJSwn0jdb2198Q3PGouKn8/edit?usp=sharing
- Upload your data
Now that your data is ready, we need to upload it to OpenAI. You can do this by using the console on your computer (requires coding), but for this example we will use Easy GPT that lets you upload your data and fine-tune your model via a clean UI.
For this, you need to create an account and assign your API key. After that you can go to the “Files/create” section and upload your CSV.

- Organize your information
In order for OpenAI to process your data, you need a special syntax. Easy GPT helps you to quickly organize your data in the correct format by clicking these 3 checkboxes:

- Create a fine-tune
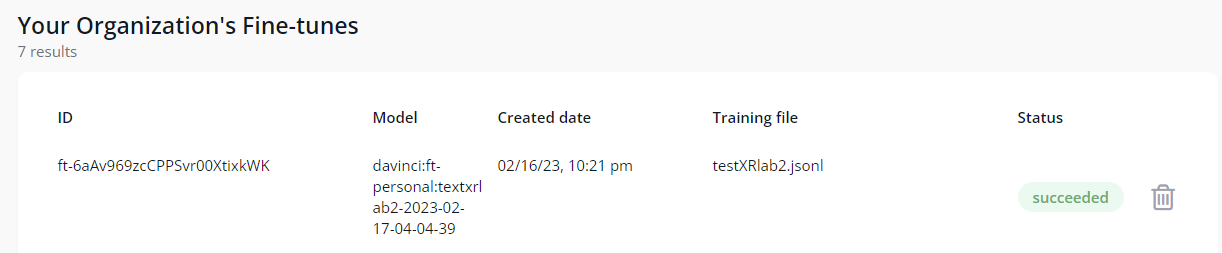
Once your data is uploaded to Easy GPT, you need to create your fine-tune model. Go to the “Fine-tunes/create” section and complete the information there. The file that you choose there should be the file you uploaded before.

The fine-tuning process can take up to 30 minutes, you can see the progress on the “Fine-tunes/Table” section. Once the process is done you will see a “succeeded” message next to your model.
- Test your model
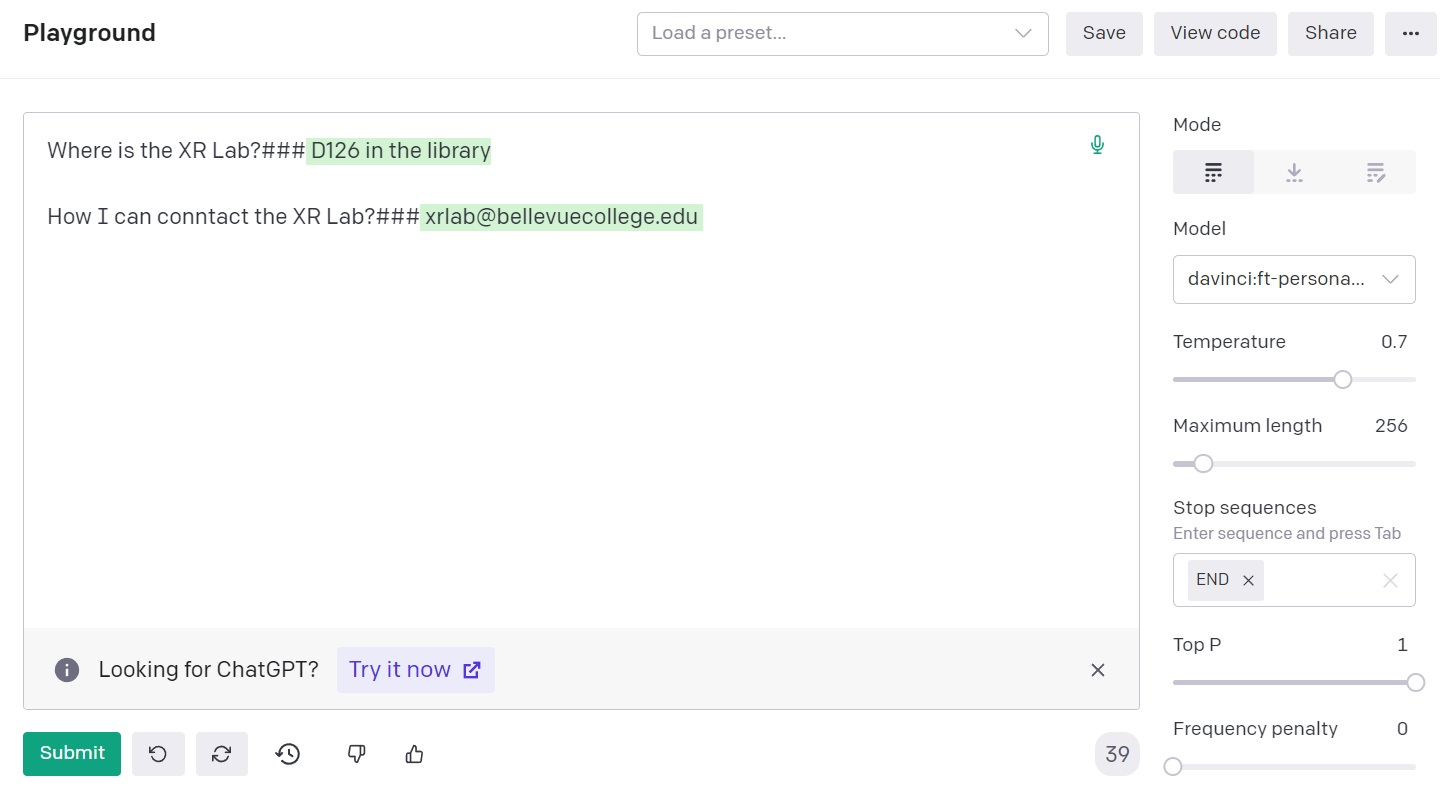
After uploading your data, you’ll want to test it to see how well it performs. We will use the OpenAI Playground for this, here you can select the model we created before and start asking questions. Remember to end the question with the suffix that you defined earlier (###), and add the stop sequence word (END) on the settings.
- Refine your model
If your model doesn’t perform as well as you’d like, you can refine it by tweaking the parameters or gathering more data. This is an iterative process, and you may need to refine your model several times before you get the results you want.
Conclusions
Our goal was to generate an easy way to learn about our lab using natural language. Although deep AI model customization might still require coding, we were able to create this proof of concept using free no-code tools. If you are interested in continuing to learn about this subject, we invite you to check the OpenAI documentation about fine-tuning.
Last Updated September 21, 2023