
You likely have a lot of content built into your Canvas courses already. If you’re completely happy with the design and functionality of your pages, you may want to simply add some advanced elements, such as quick check quizzes, using Cidi Labs. Or, you may want to add an image banner. Please view the other “how tos” to get information on how to do these things.
This resource will show you how to bring your content into Cidi Labs as content blocks. This method takes a bit longer than adding elements to your existing page structure, but it will provide more styling options and a uniform look to your content. Further, this process will support the creation of accessible content.
- Click “edit” at the top of your Canvas page.

2. Launch the Design Tools interface by clicking on the rocket icon in the upper right-hand corner of the screen, or by using the short-cut keys Option-Shift-D on a Mac or Alt-Shift-D on a PC.

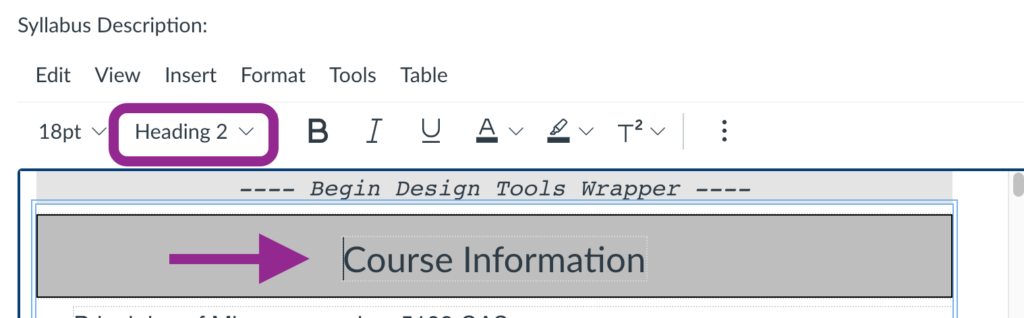
3. Double check the heading structure in your Canvas page. Major sections of your page should be styled as heading level 2 (H2). To check this, click anywhere on that line of the page and look at the heading structure in the rich content toolbar. Fix your heading structure if needed.
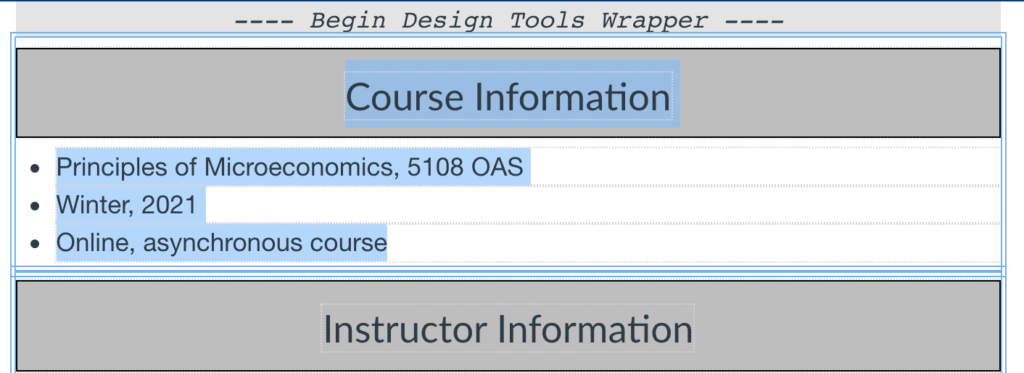
4. Highlight a content block in your page. A content block includes the heading and the paragraph text underneath.
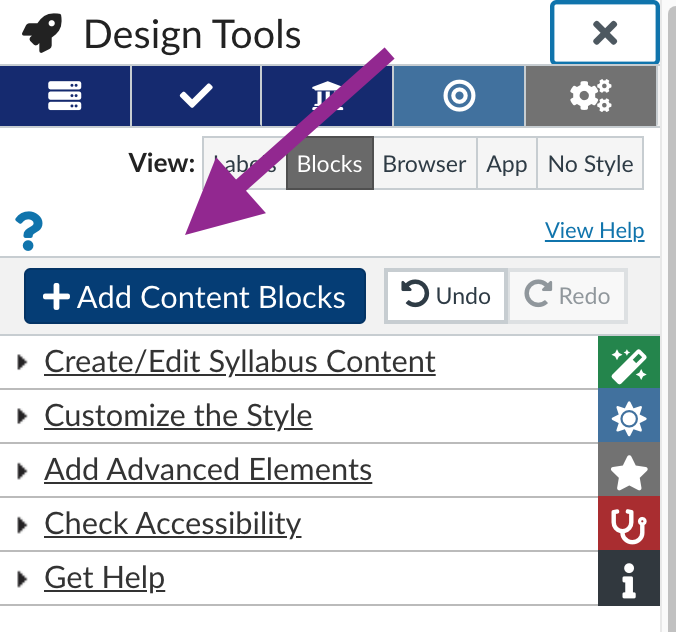
5. Click on “Add/edit content blocks” to open the content block editor.
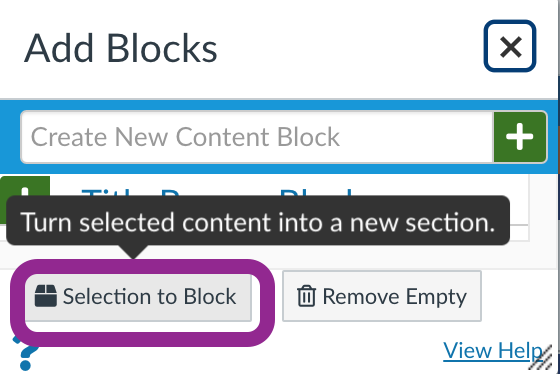
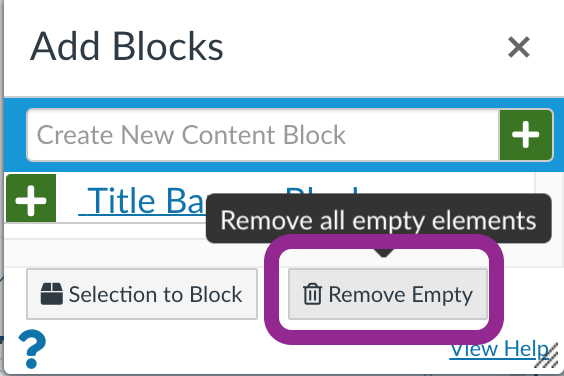
6. In the content blocks pop-up window, choose “selection to block.”
7. Highlight the next header and paragraph block on your page and repeat the “selection to block” process. Continue this until all the page content has been moved into content blocks in Cidi Labs.
8. After you have moved all the content blocks into Cidi Labs, choose the “remove empty” option in the “add blocks” pop-up. This will delete orphan content and clean up the syllabus page. Do this stop only after you are sure that all desired content has been moved to blocks inside the design tools wrapper.
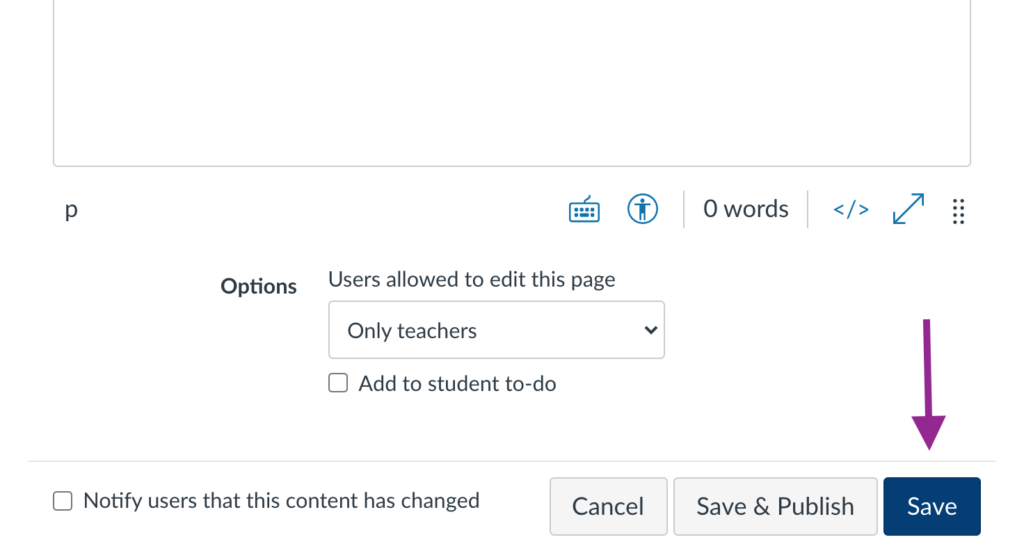
9. Save your page.
- Click on “edit” on the Canvas page to open the rich content editor.

2. Launch the Design Tools interface by clicking on the rocket icon in the upper right-hand corner of the screen, or by using the short-cut keys Option-Shif-D on a Mac or Alt-Shift-D on a PC.

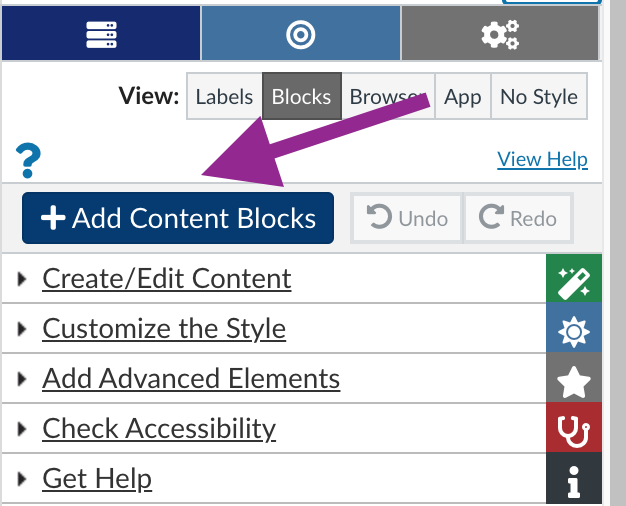
3. To add, delete, or move content blocks, click on the “Add Content Blocks” option in the Design Tools editor.
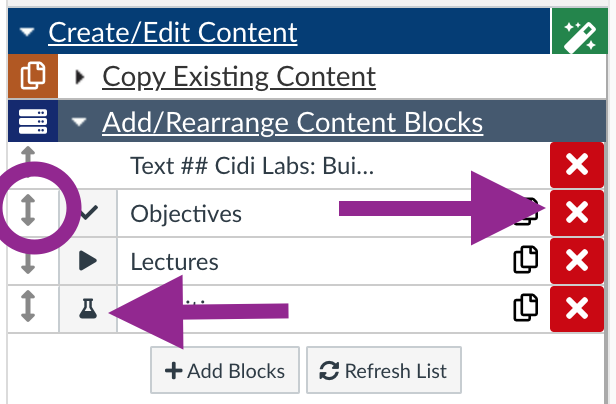
4. Once the content blocks have been created, you can make changes to the blocks in the Add/Rearrange Content Blocks editor. Here, you can rearrange the block order, delete unwanted blocks, add or remove icons associated with each block, and add new blocks.
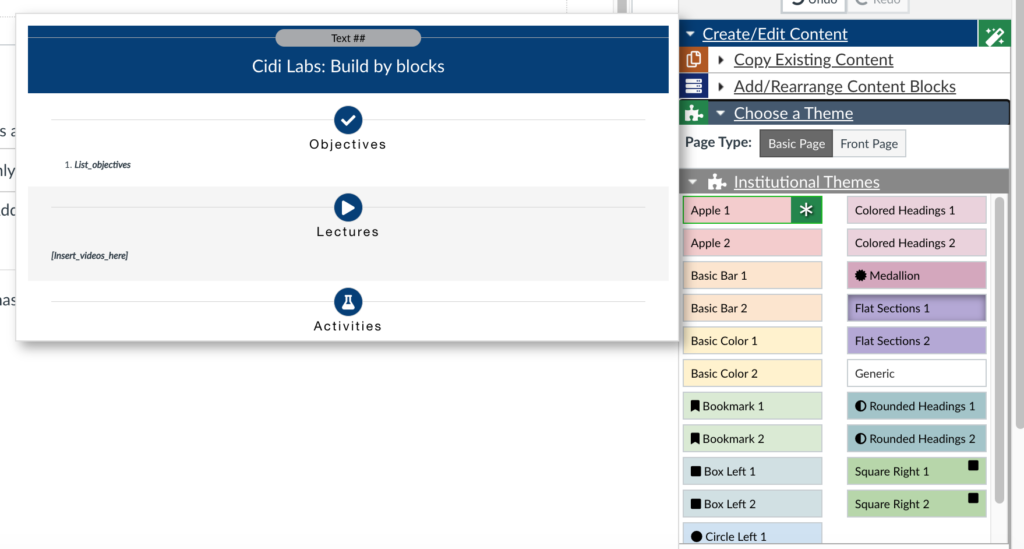
5. Click on “Choose a Theme” in the “Create/Edit Syllabus Content” drop-down menu.
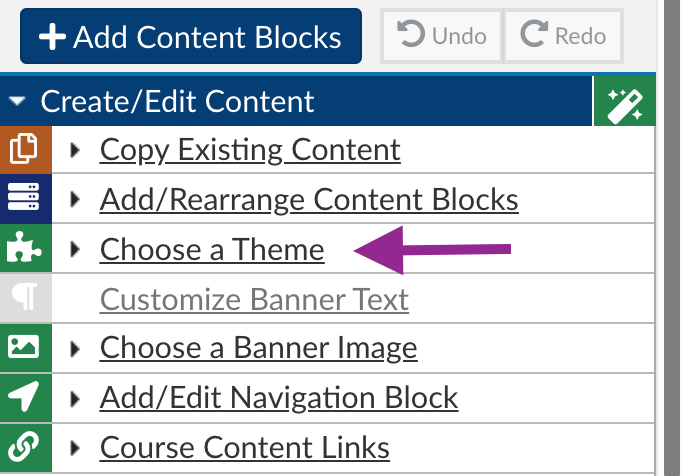
6. Hover over the different themes to see a pop-up view of that theme. Choose a theme.
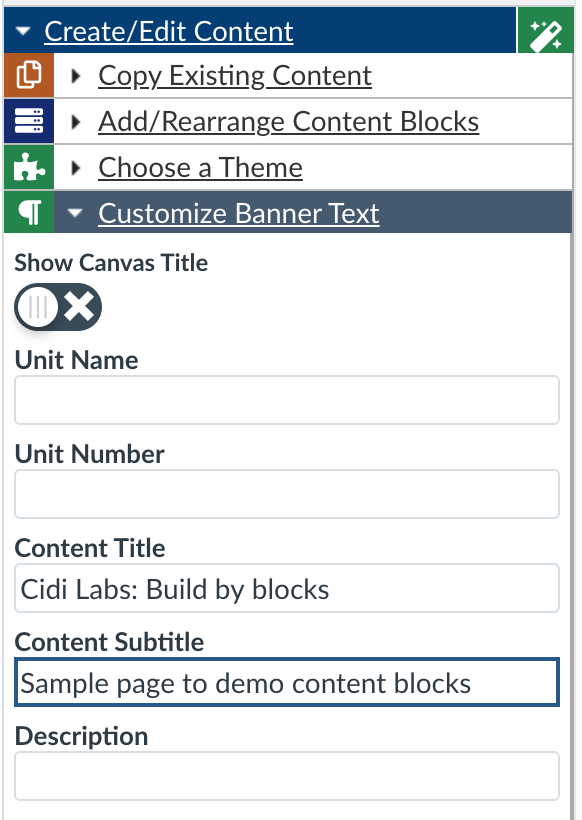
7. Click on “Customize Banner Text” in the Create/Edit Content” drop-down menu.
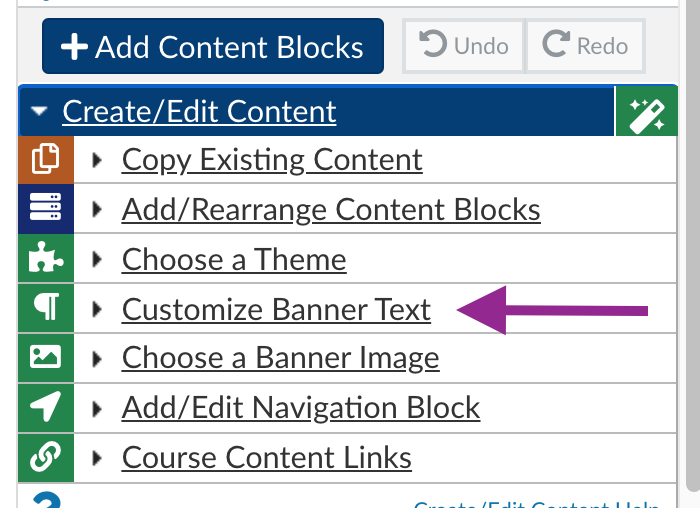
8. Add your banner text in the fields provided; remove unwanted text.
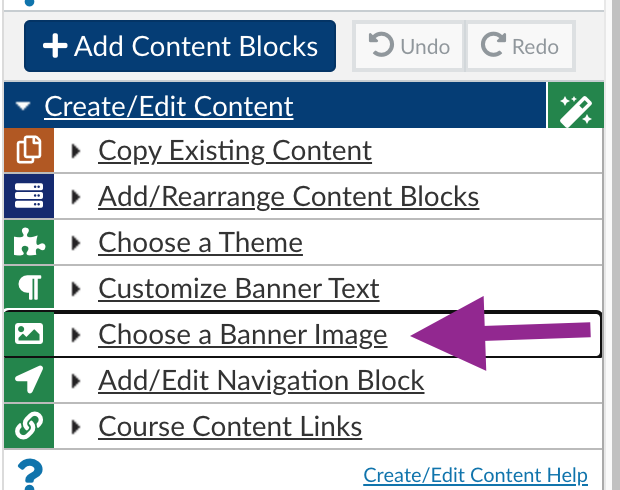
9. If you would like to add a banner image to your page, click on “Choose a Banner Image” option in the Create/Edit Content menu.
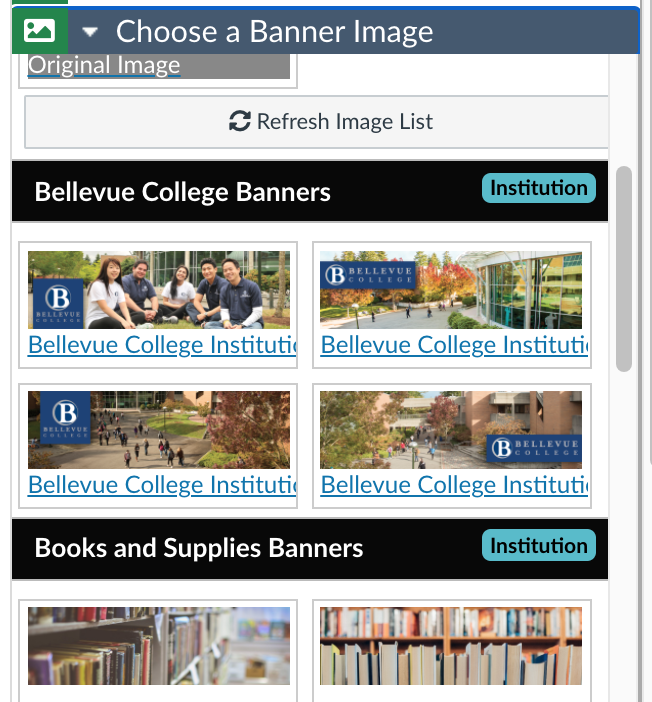
10. Choose an institutional banner template, or choose an image from your own course files.
11. Save your changes.
Last Updated February 18, 2021