
Explore the information below to learn how to view your class schedule(s) in ctcLink.
Step-by-Step ctcLink Class Schedule Tutorial
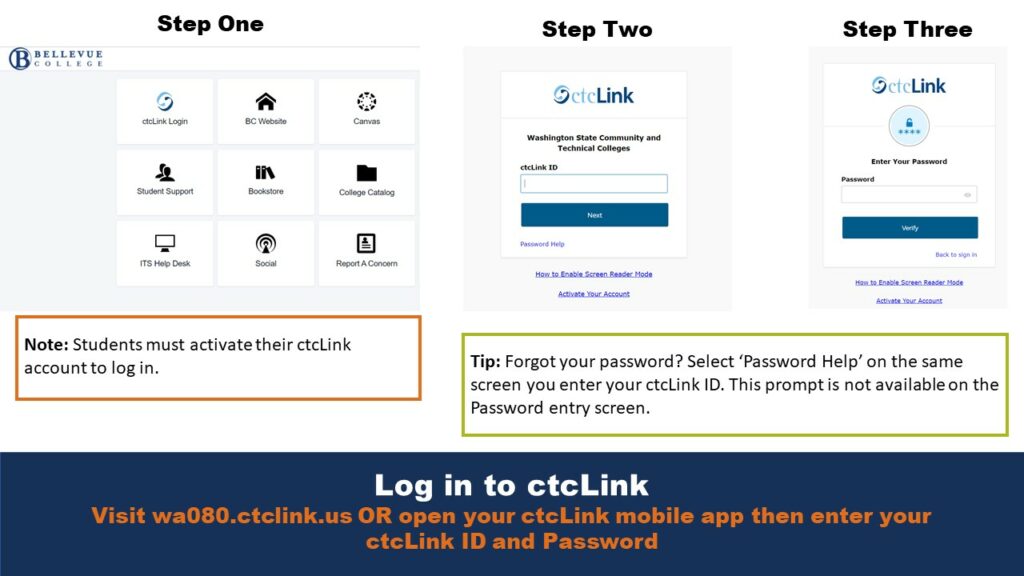
Log in to ctcLink
Visit wa080.ctclink.us OR open your ctcLink mobile app then enter your ctcLink ID and Password
Note: Students must activate their ctcLink account to log in.
Tip: Forgot your password? Select ‘Password Help’ on the same screen you enter your ctcLink ID. This prompt is not available on the Password entry screen.
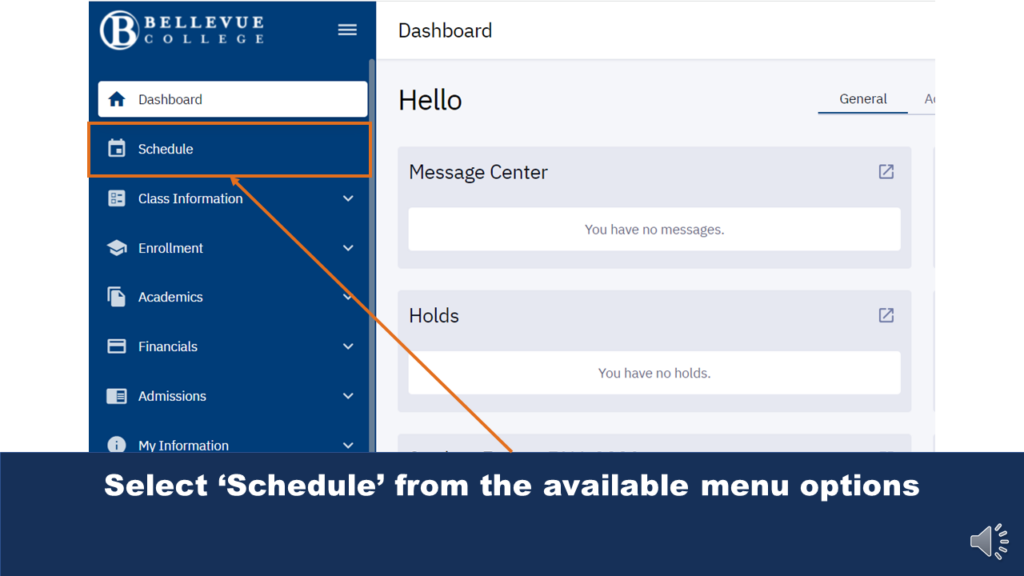
Select ‘Schedule’ from the available menu options
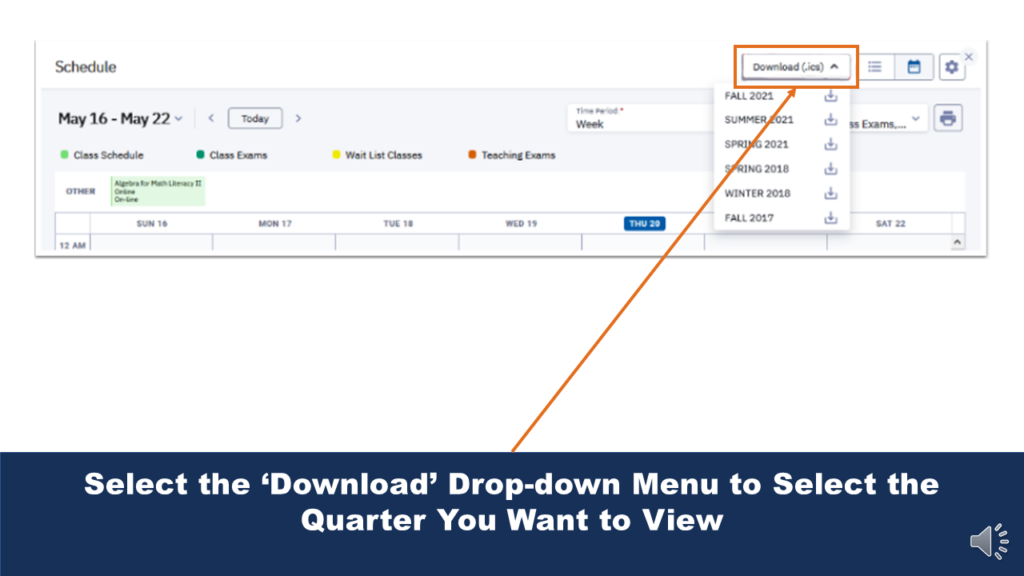
Select the ‘Download’ Drop-down Menu to Select the Quarter You Want to View
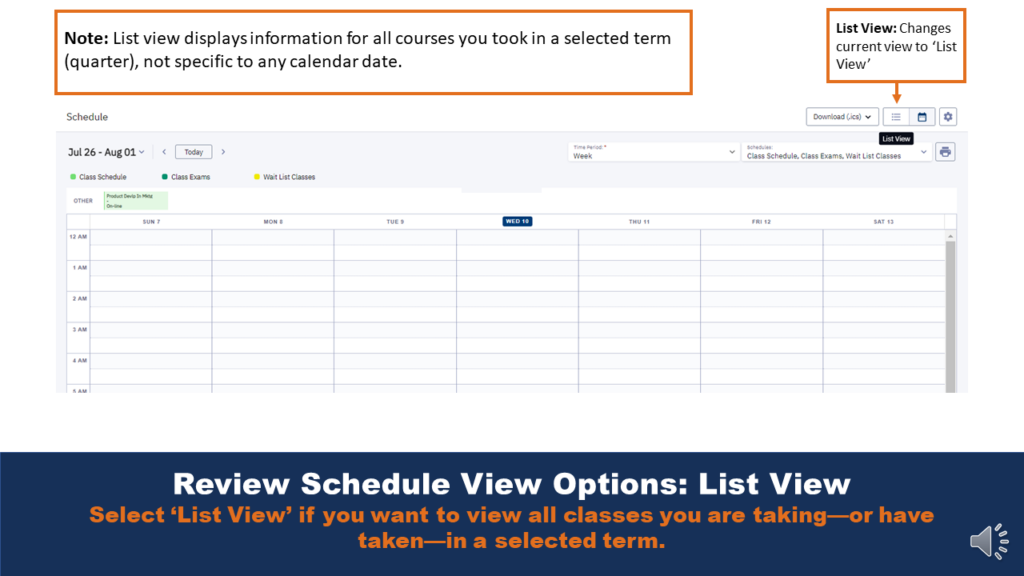
Step Four: Review Schedule View Options: List View
Select ‘List View’ if you want to view all classes you are taking—or have taken—in a selected term.
Note: List view displays information for all courses you took in a selected term (quarter), not specific to any calendar date. List View: Changes current view to ‘List View’
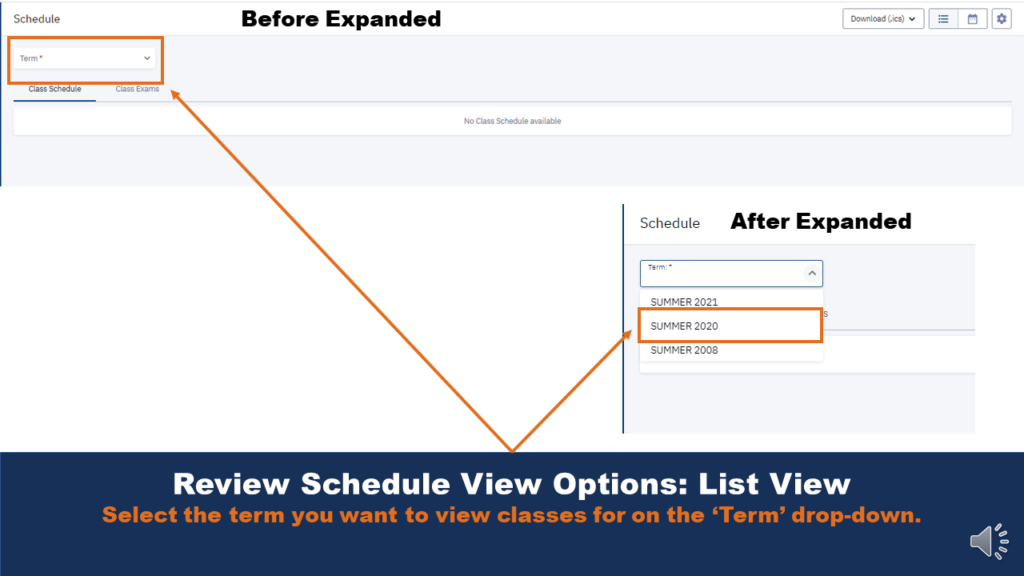
Step Five: Review Schedule View Options: List View
Select the term you want to view classes for on the ‘Term’ drop-down.
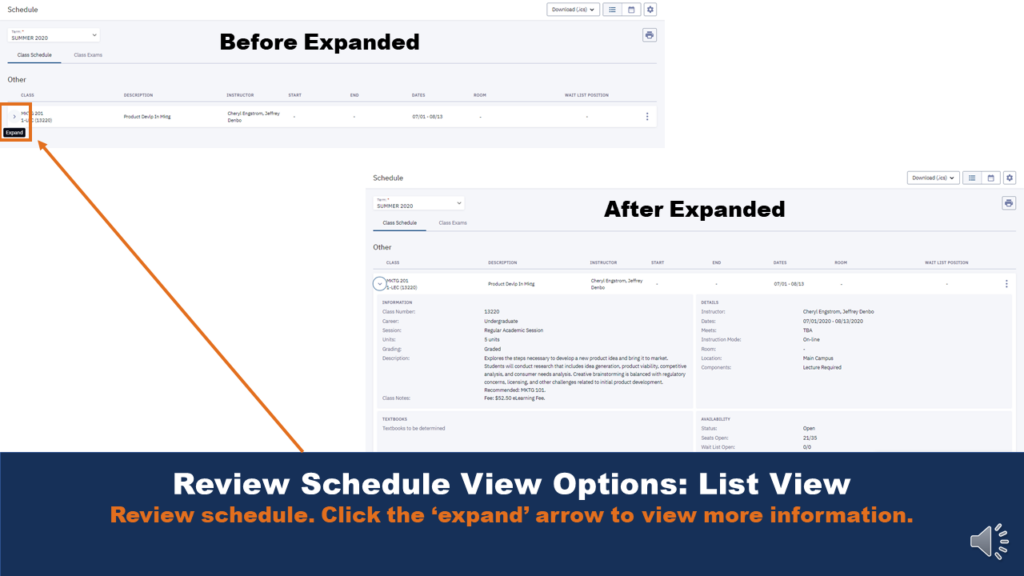
Step Six: Review Schedule View Options: List View
Review schedule. Click the ‘expand’ arrow to view more information.
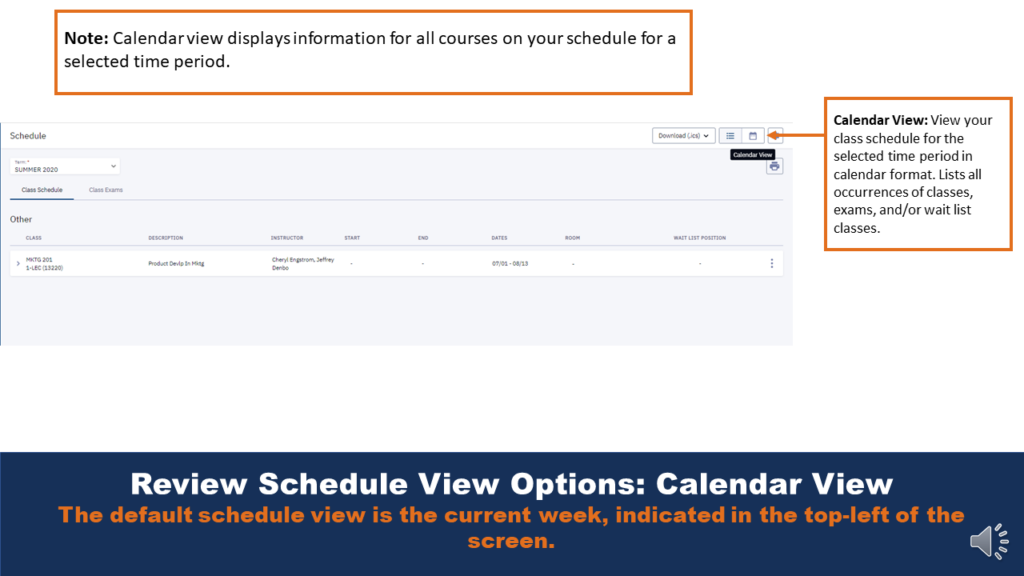
Step Seven: Review Schedule View Options: Calendar View
The default schedule view is the current week, indicated in the top-left of the screen.
Note: Calendar view displays information for all courses on your schedule for a selected time period.
Calendar View: View your class schedule for the selected time period in calendar format. Lists all occurrences of classes, exams, and/or wait list classes.
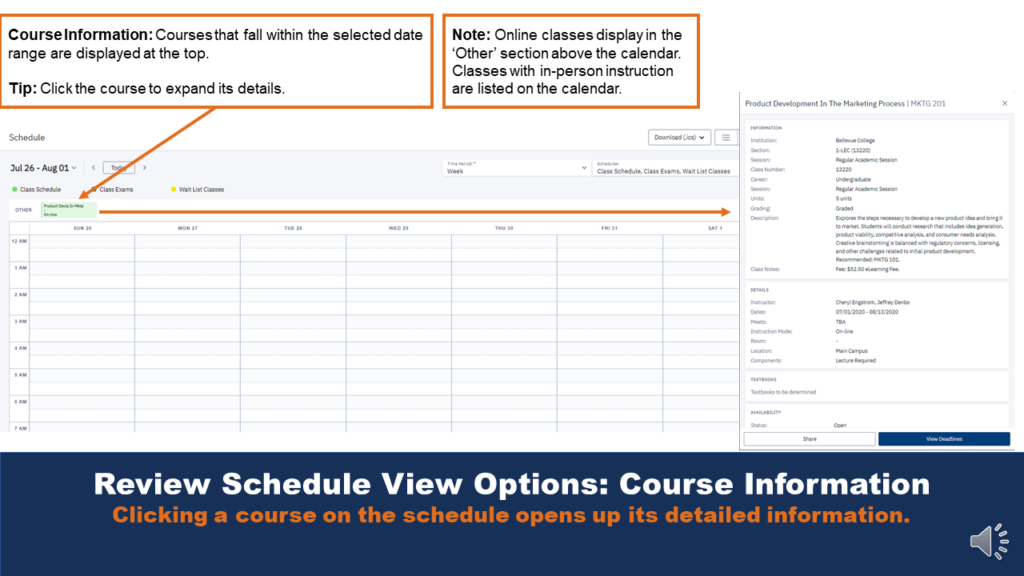
Step Eight: Review Schedule View Options: Course Information
Clicking a course on the schedule opens up its detailed information.
Course Information: Courses that fall within the selected date range are displayed at the top.
Tip: Click the course to expand its details.
Note: Online classes display in the ‘Other’ section above the calendar. Classes with in-person instruction are listed on the calendar.
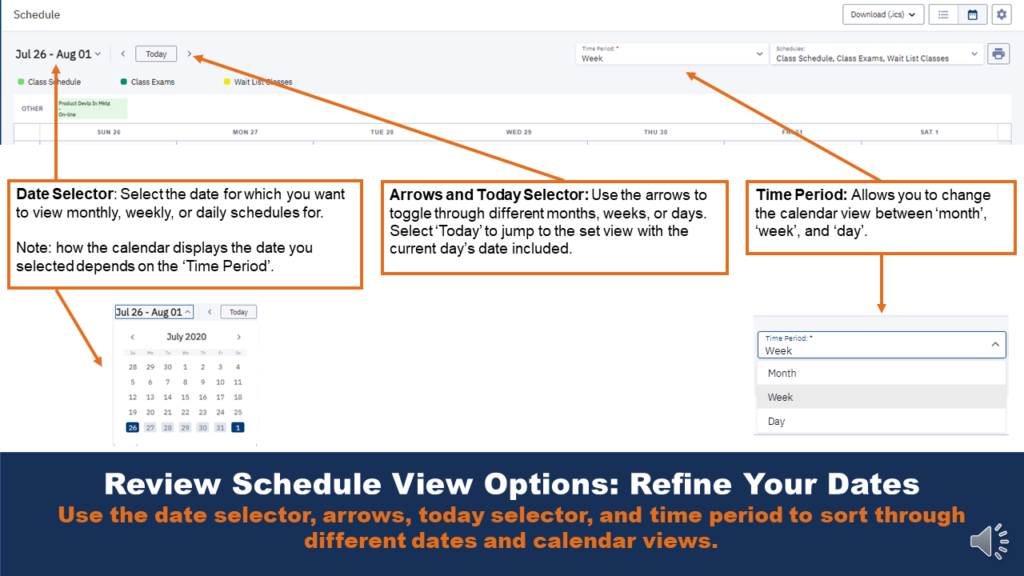
Step Nine: Review Schedule View Options: Refine Your Dates
Use the date selector, arrows, today selector, and time period to sort through different dates and calendar views.
Date Selector: Select the date for which you want to view monthly, weekly, or daily schedules for.
Note: how the calendar displays the date you selected depends on the ‘Time Period’.
Arrows and Today Selector: Use the arrows to toggle through different months, weeks, or days. Select ‘Today’ to jump to the set view with the current day’s date included.
Time Period: Allows you to change the calendar view between ‘month’, ‘week’, and ‘day’.
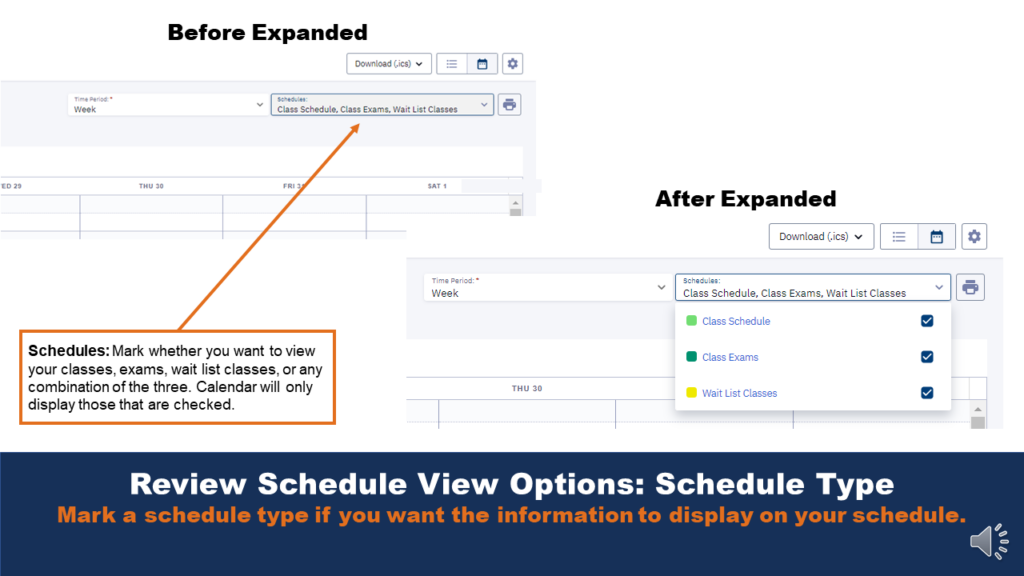
Step Ten: Review Schedule View Options: Schedule Type
Mark a schedule type if you want the information to display on your schedule.
Schedules: Mark whether you want to view your classes, exams, wait list classes, or any combination of the three. Calendar will only display those that are checked.
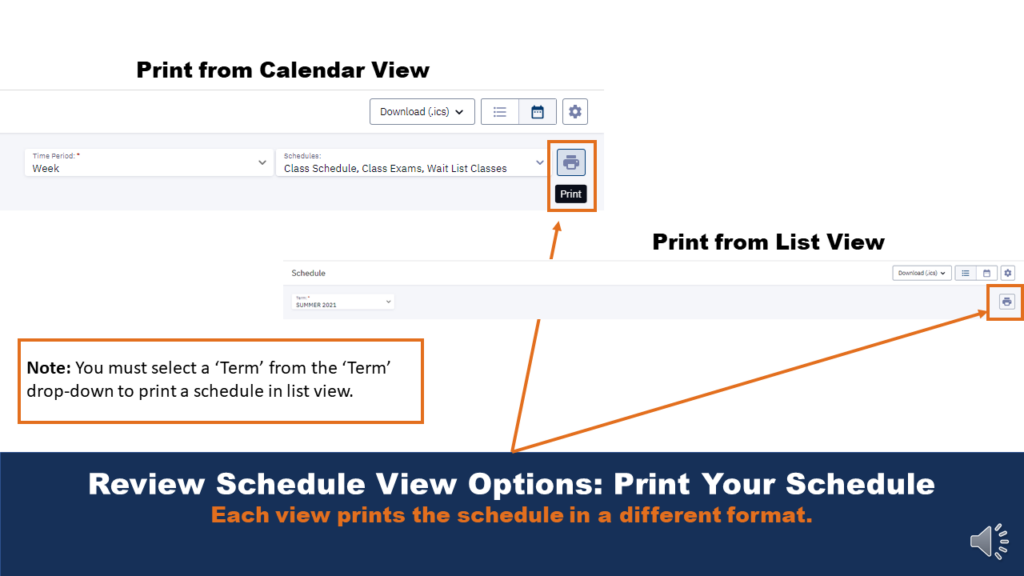
Step Eleven: Review Schedule View Options: Print Your Schedule
Each view prints the schedule in a different format.
Note: You must select a ‘Term’ from the ‘Term’ drop-down to print a schedule in list view.