
Explore the information below to learn how to search for classes in Bellevue College’s ctcLink public class schedule.
Step-by-Step ctcLink Class Search Tutorial
To view the class schedule, you have two methods. Please note that both methods redirect to Bellevue College’s ctcLink class schedule.
Method One: Visit Bellevue College ctcLink mobile portal (wa080.ctcLink.us) and select ‘Class Search’.
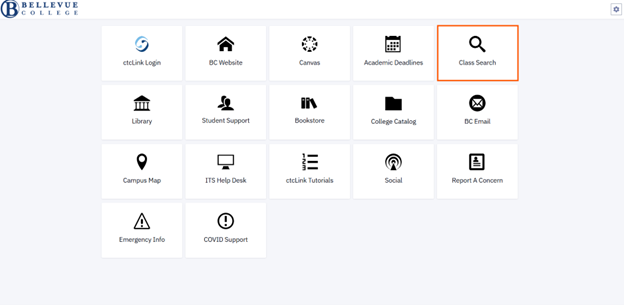
Method Two: Open this Class Search link.
There are three options:
- Class Search
- View course sections offered for each class and subject in a selected term (quarter).
- Browse Classes
- View classes offered for each subject in a selected term
- Course Catalog
- View subjects offered and classes within them, not specific to any quarter.
Use the ‘Term’ drop down. This is a required field.
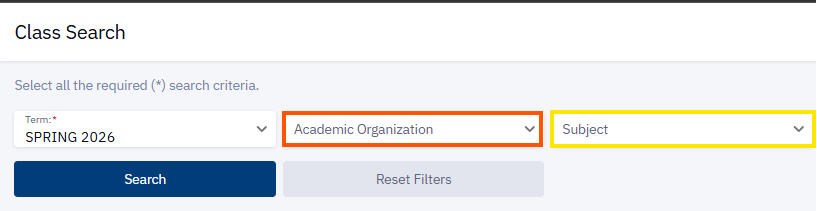
Academic Organization (Outlined in orange)
Use this field to perform a search for all classes in a selected term for a given topic. This includes CCN and non-CCN courses, with CCN courses listed after non-CCN courses. CCN stands for Common Course Numbered. These courses more easily transfer to other community and technical colleges in Washington State. CCN courses have an ‘&’ after their course name.
Subject (Outlined in yellow)
Use this field to perform a search for classes in a selected term, further separated by CCN and non-CCN courses.
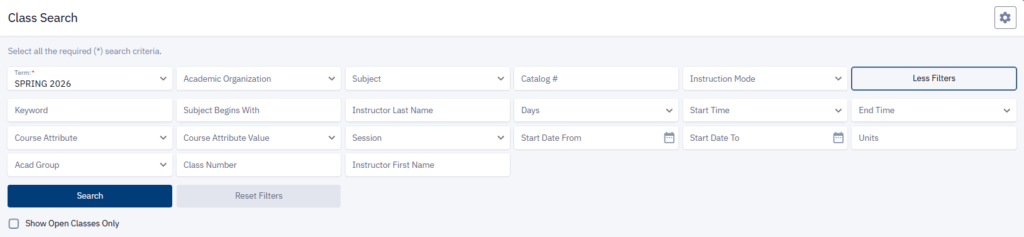
Expand “More Filters” to see all the options you have to search for classes.

When you select ‘More Filters’, here is what you will see (details provided at end of tutorial).
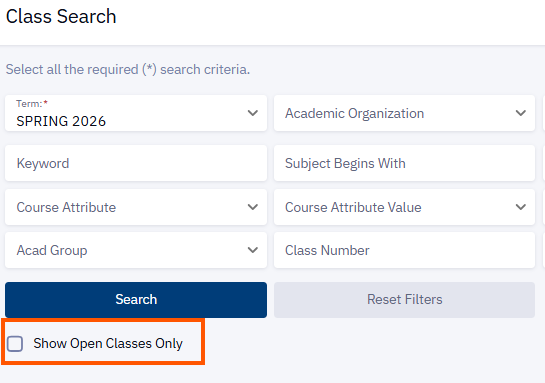
Decide if you want to see only open courses or all courses.
Select the check box to display only classes with available space, leave it blank to show classes with waitlists.
Information displays sections by courses and quarter.
Summary fields for each section include:
- Days: Indicate what days of the week the course takes place
- Start/End: Indicate start and stop times for classes
- Room: Where class is located on campus
- Status: How many spots are available

Click on the left-side arrowhead to expand the detailed sections for the course which includes ‘Information’, ‘Details’, and ‘Availability’.
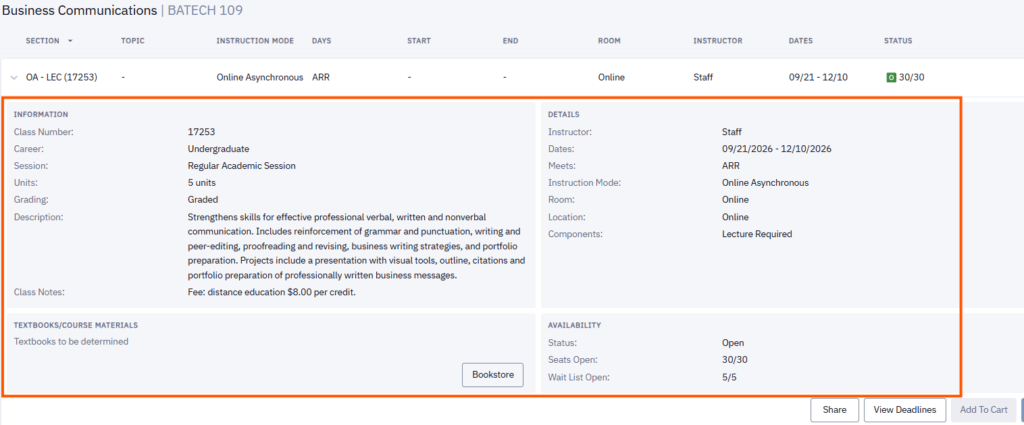
Note: Available seats in a course section are indicated in two places:
- Beneath ‘Status’ in the section summary AND
- In the ‘Availability’ detailed section
The first number is the number of spots still available, and the second number is the total number of spots for the class or waitlist.
Tip: Write down the class number for the sections you want to register.
Filter Options include:
Summary Fields
Term: What term (quarter) you look up classes for.
Academic Organization: Displays all courses (CCN and non-CCN) within a topic.
Subject: The subject of the courses you want to display information for.
Catalog #: A three-digit number associated with a course at Bellevue College. For example: 108 for BIOL 108.
Instruction Mode: The type of course format you prefer. Includes ‘In Person’, ‘Hybrid’, ‘On-line’, ‘Independent Studies’, and ‘Other’
More Filter Options
Keyword: Enter a word or phrase you want to see classes that might cover or contain the topic.
Start/End Time: Preferred time you want your course to start and/or end.
Days: Preferred days of the week you want your course to be held on. Please note: Online courses do not have specific days of the week.
Class Number: A specific number associated with a course section.
Course Attribute: Select ‘Bellevue Defined Attributes’. This is used in combination with ‘Course Attribute Value’ to display classes in subjects that fulfill particular degree requirements or are part of a specific category.
Course Attribute Value: Different options available to filter courses by, based on Bellevue College defined attributes (categories) or degree requirements. For example: Diversity Degree Requirement.
Instructor Last Name: The last name of the instructor you want to display course sections for.
Units: The number of units (credits) you want the course(s) to display information for